Friday, November 5, 2010

Morning Tea Recipes


Hope you’ve all had a lovely week. We’ve had a pretty quiet one and this afternoon we’re off to our friends’ wedding which will be fun.

As promised, here is the recipe for the Powder Puffs I made at my Pink Ribbon Morning Tea Fundraiser
last weekend. A few people also asked for the Jelly Cheesecake recipe so I’ve included that too. I’ve added a few tips under each one to explain some things I do when making these. Let me know how you go if you give either of these recipes a try and if you have any questions, or if anything in these recipes isn't clear, please ask.
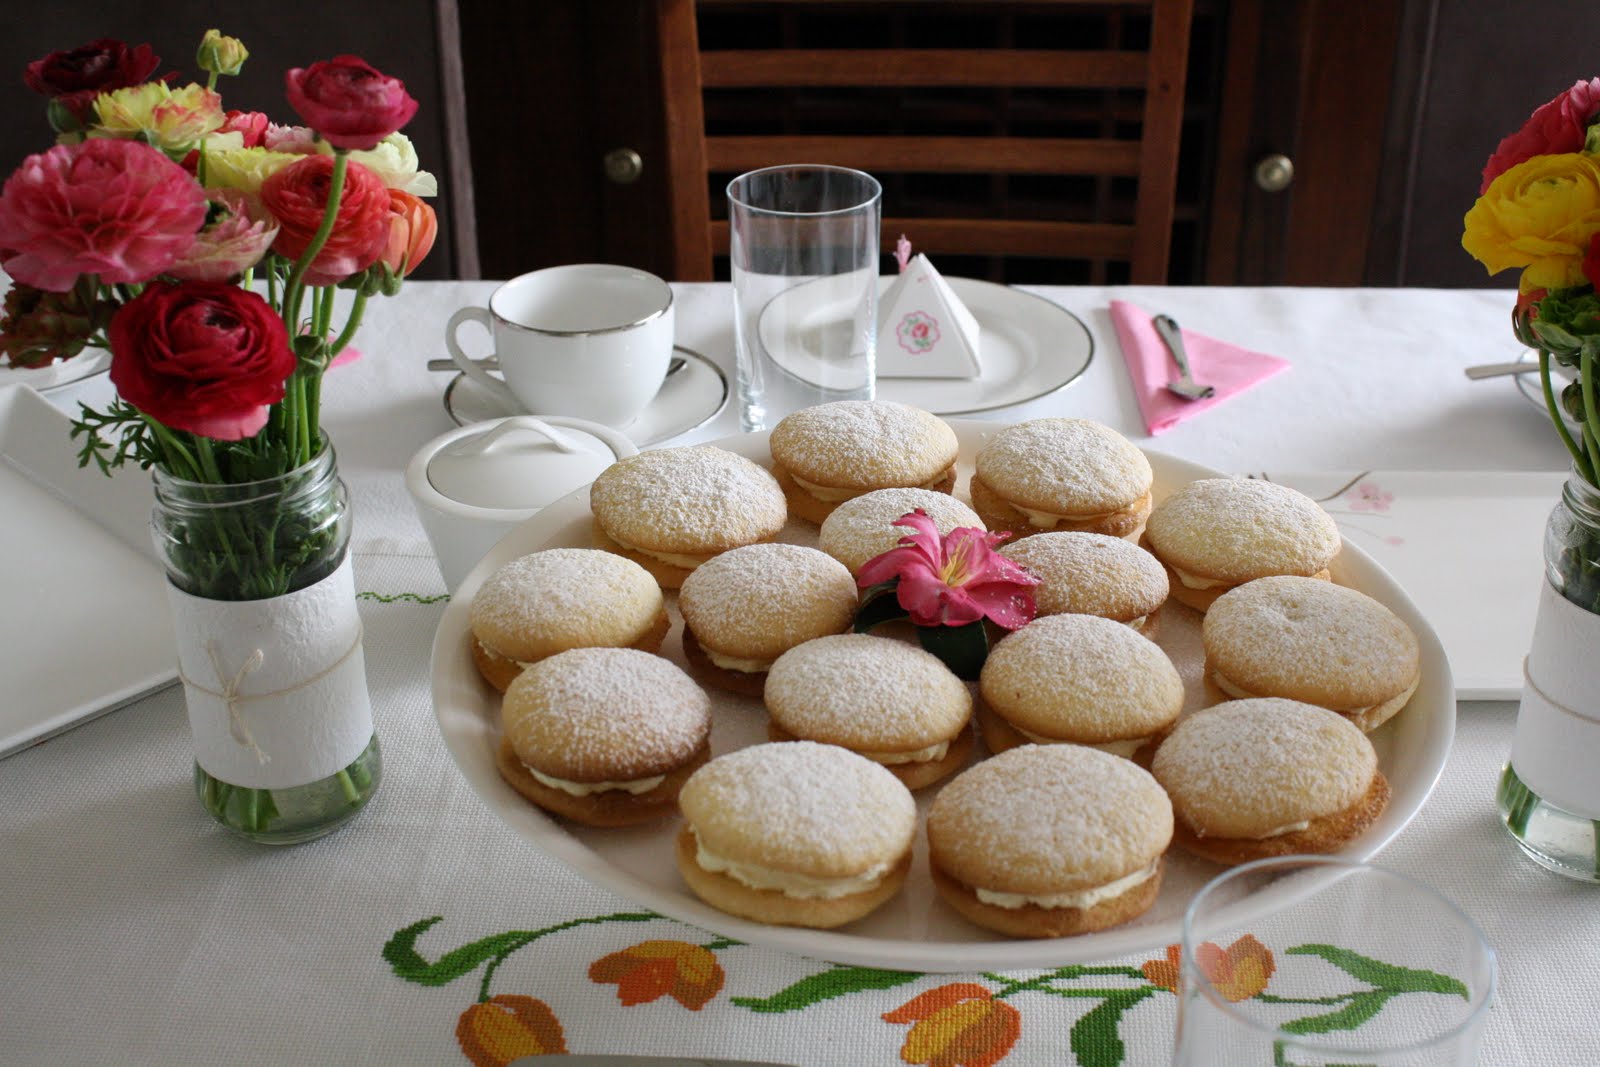


Powder Puffs
(Makes what you see above plus a few extra)

I chose to make this recipe for my morning tea as it is one which can be made the day before an event. In fact these are much better served the next day when they’ve had time to soften. For a morning tea, I would usually make these the afternoon or night before.

2 eggs
½ cup sugar
½ cup cornflour + 2 extra rounded soup spoons
2 tbsp plain flour
½ tsp cream tartar
¼ tsp carb soda

Preheat oven to 200°C. Beat egg whites and sugar well together (nice glossy peaks). Add beaten egg yolks, then dry ingredients which have been sifted 2 or 3 times. Cover baking tray with baking paper, spray lightly with oil and drop teaspoons of mixture two inches apart. Bake 5-10 minutes (I found 6 mins was good) in fairly warm oven. Put together with whipped cream two or three hours before needed and dust both sides with icing sugar.


Tips:

When dropping the batter onto the tray, I use a teaspoon of mixture (not too overloaded) and hold the spoon upright to let the batter drop off to make nice round circles.

When these come out of the oven, they will appear pretty hard and perhaps a bit crisp. This is normal. When they are cool, pair them up as best you can in similar sizes and fill them with cream (I whip 300ml of thickened cream together with some vanilla essence and 2 tablespoons of icing sugar).

When placing these on your platter, lightly dust it with icing sugar first to stop the powder puffs sticking.

Put in the fridge – after several hours, they will soften up. Take out of the fridge for a little while before serving.


Jelly Cheesecake

As with the powder puffs, this recipe is a great ‘prepare ahead’ one which can be done the day or two before an event.

Jelly:
1 pkt raspberry jelly (you could use an alternative flavour)
1 cup boiling water
1 cup cold water

Biscuit Base:
6 oz butter (melted)
Marie biscuits (I used a packet less 6 biscuits)

Filling:
1 tin condensed milk
½ cup boiling water
1 tbsp gelatine
125 g cream cheese
juice of 2 lemons

Crush biscuits. Add melted butter. Press into lamington tin (25x30cm) - I line the tin and I use the bottom of a glass to press in the mixture nice and firmly. Beat cheese. Add condensed milk, then juice. Dissolve gelatine in boiling water. Add to mixture. Beat well for 10 minutes. Spread over base. Allow to slightly firm before continuing with jelly. Make jelly with boiling water and then add cold water. Leave to sit for a bit (but don’t let it set) before pouring over the filling. Refrigerate several hours or overnight. Cut into squares when firm.


Tips:

There is nothing too difficult about this recipe except, it’s important to let the cheesecake layer slightly set before you pour over the jelly. When pouring over the jelly, I use a jug and pour it over the back of a large metal spoon very slowly. This stops the jelly from making a hole in your cheesecake layer.

For my morning tea, I piped some of the cream I’d whipped for the powder puffs above on top.

To serve, I cut the cheesecake into nice even squares (I trimmed off the edges to make my squares neater).

Wednesday, November 3, 2010

My Favourite Frock


Do you have an all time favourite item in your wardrobe? For me it's the dress above which is definitely one of my 'best buys'. I spotted it at Picnic a few years ago and thought I'd try it on to make myself feel better about having to leave it on the rack when it didn't fit right. It ended up fitting perfectly and with several upcoming weddings to attend, I bought it.

I have worn this dress over and over to functions we've been to and with another wedding to attend this Friday and no time to shop for something new, I'm contemplating getting yet another wear out of it.

What about you? What is your all time favourite item of clothing that you would describe as your 'best buy'?


Monday, November 1, 2010

Home Feature At Honey And Fizz


Today I’m really excited because my home has been featured over at my bloggy friend Simone’s blog Honey and Fizz. She’s starting a series of posts where she’ll share a peek into the homes of fellow bloggers and today the spotlight was on our place.

Pop over to her lovely blog here to see a few snippets of my house and for those who aren’t already familiar with Honey and Fizz, be sure to browse through some of her past posts which are always full of inspiration…

Giveaway Winner


Sorry this post is a bit late but thank you to everyone who entered my 'first year of blogging' giveaway. Using an online random number generator (sorry I wasn't sure how to insert the image for this on my blog), the lucky number selected was comment #32 which was left by Deb of Let's Go Moerkabout. Congratulations!! I will get your goodies in the post to you as soon as possible.

Sunday, October 31, 2010

Pink Ribbon Morning Tea Fundraiser


On Saturday morning, I held my Pink Ribbon morning tea to raise money for breast cancer research. I organized as much as I could on Friday and was so exhausted by the time evening came around that I ended up falling asleep in the middle of watching my usual favourite Friday night lifestyle shows. However, this meant I was not stressed yesterday morning and was cutting the last sandwich just as my first guests arrived.

I couldn’t really avoid using pink to decorate since it is the colour associated with this fundraiser. However seeing as the last three parties I have organized have incorporated pink somewhere in the colour scheme, I tried to create a pretty spring inspired table instead which was mainly white with the addition of a few bright colours. This year I decided to keep the numbers smaller to have a more intimate party and so while I did add a few special touches to the table, I didn’t go overboard. I managed to take some photos to share with you all using our new DSLR (which I am loving) so here are a few details…


I made the invites myself on Microsoft Publisher. I used a photo I had previously taken and manipulated it in a photo program to give it more of a ‘painted effect’.


Instead of selling Pink Ribbon merchandise, this year I decided to hold a raffle to raise money. I bought a pretty white hydrangea plant as the prize and sold tickets to enter.


The only decorations I used as such were three accordion paper flowers which I stuck to the wall in the corner for a burst of ‘pink’. They were easy to make using decorative paper (thin paper worked best) and you can make these yourself using the tutorial by Disney of Ruffles and Stuff featured at City Cradle Design.


When I woke yesterday morning, there was quite a strong breeze outside, so I made the call to hold my morning tea indoors rather than out on the patio (luckily our windows had been cleaned earlier in the week for the first time in months so we could still enjoy the view of our garden). I covered the dining table with a white linen tablecloth and placed a table runner which is embroidered with bright spring-like blooms down the middle. I used white crockery and white platters for all the food.


To brighten the table, I bought a bunch of ranunculus which I divided between two jars I had covered in textured white paper. I was initially searching for a pink bunch which I couldn’t find when I went to buy them. However, I am actually glad I came home with the bunch I ended up with as the mix of colours really added to the spring colour palette I was aiming for.


As a gift to guests to thank them for coming to my party, I made some pretty little boxes which each had a Cath Kidston soap inside. The boxes I used were ‘no-glue’ boxes which I had discovered on the Internet a while back and saved in my ‘to make’ folder. I used the pattern on the Lil Magoolie blog as a template and simply traced around them on white card (I used quite sturdy Bazzill card). I glued a decorative Cath Kidston print onto the boxes and tied them with pink embroidery thread using a very small punch to make the holes.


For the food, I made sausage rolls, finger sandwiches (chicken and chives with aioli and curried egg and lettuce), chocolate brownies, powder puffs and jelly cheesecake. I will share the recipe for these powder puffs later in the week for those who are interested.


I really enjoyed putting together this year’s fundraiser and liked having a smaller, cosier gathering. It was a great excuse to plan and put together a little party for such a worthwhile cause and I hope I may have inspired some of you out there to host something similar yourself next year.